Linux on Lenovo Legion
Please make sure you back up everything on your computer before attempting to install Linux, even if you intend to dual boot, in case you accidentally wipe your Hard Drive.
This guide should apply to all Lenovo Legion and IdeaPad Gaming series laptops made in or after 2020, and the process should be similar for all modern laptops with Intel or AMD CPU's.
Known Issues
NVIDIA GPU drivers do not properly support power limit changes on Linux, meaning your GPU will always act like your laptop is in quiet mode.If you have a 3050/50Ti your GPU will be limited to 60W.If you have a 3060, your GPU will be limited to 80W.If you have a 3070/70Ti or 3080/80Ti, your GPU will be limited to 115W.
As a result of this the gaming experience on Linux is currently very poor compared to on windows.- This was fixed with Nvidia Driver 530.41.03 :)
Recommended Linux Distributions:
Best on Lenovo Legion laptops:
- Fedora - Open source version of Red Hat, Rolling Release.
- Why Fedora? It's always one of the first distributions to get new software, new features. This is something YOU WANT. Why?
- Because Wayland. Wayland is huge because (if paired with desktop such as KDE Plasma 6 or Gnome) supports fractional scaling, which is a must on laptops. Debian 12 or Ubuntu 22.04 don't support KDE Plasma 6.
Otherwise you can use any Linux Distro you like, but here are some I recommend if you are unsure:
Beginner Distros (Use one of these if this is your first time using Linux):
- Ubuntu - Forked from Debian, tried and tested, somewhat heavy but very well documented.
- Official Ubuntu flavors (Kubuntu, Lubuntu, Xubuntu, Ubuntu MATE, etc.) - Ubuntu with a different Desktop Environment and preinstalled apps.
- Zorin - Clean, modern, and lightweight. Most Windows-like user interface.
- Linux Mint - Lightweight, tried and tested, similar-ish look and feel to Windows 10.
Pop!_OS - Comes with NVIDIA drivers preinstalled, great for gaming or developers.(No longer recommended as it has not been updated since development on cosmic started.)
Intermediate Distros:
- Manjaro - Derived from Arch, greatly simplifies and automates the installation and usage over using straight Arch.
Advanced Distros:
- Arch Linux - You are on your own.
I will be using Ubuntu for the purposes of this guide, however the process should be similar on most distros, especially those under the “Beginner Distros” category.
Downloading Linux
Many Linux distros offer packages for multiple hardware architectures. Lenovo Legions use the amd641) architecture. As this is what most modern computers use, this will typically be the first or top download option.
You will usually see two versions available: A latest release and an LTS release. LTS stands for long-term support. I generally recommend downloading the latest release, however the long term support releases may be more stable.
The Linux operating system you choose to download will be saved to your computer as a .iso disk image file. The next step is to write this file to a USB stick.
Creating a Bootable USB
You will need a blank flash drive that has a capacity of at least 8GB. I recommend using a USB 3 stick if possible, however this will work fine with a slower USB 2 stick. It will just be slow.
We will be using BalenaEtcher to write the file to a USB stick. BalenaEtcher is a free application available for Windows, Linux, and MacOS. Download and install it if you haven’t already. When you open Etcher, you will be presented with the following user interface:
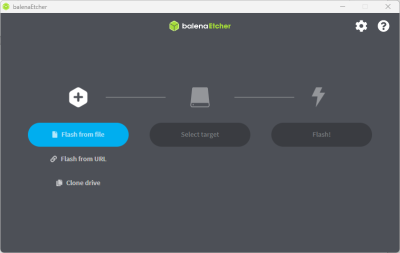
Select “Flash from File” and select the downloaded ISO file.
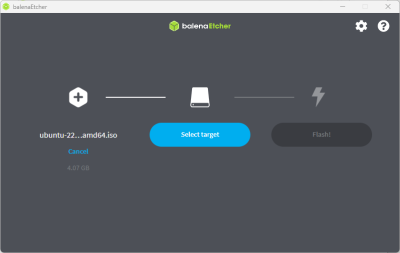
Next click “Select target” and select your USB drive.
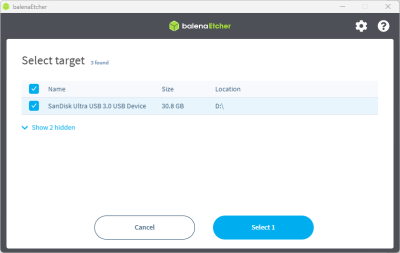
In this case, I am using a SanDisk USB Drive. Make sure your USB drive is the only drive selected.
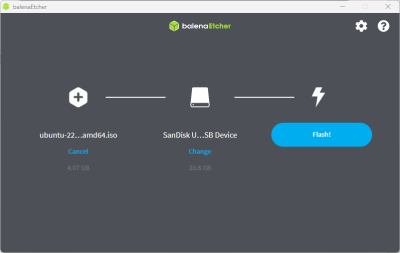
Double check that you have selected the correct ISO file and USB drive, and then click “Flash!” Etcher will now ask for administrative privileges so it can write directly to the drive, approve this request.
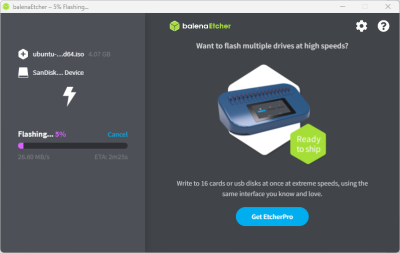
Now just wait for Etcher to do it’s thing. This can take anywhere from 5 minutes to half an hour depending on how fast your USB drive is. Be patient.
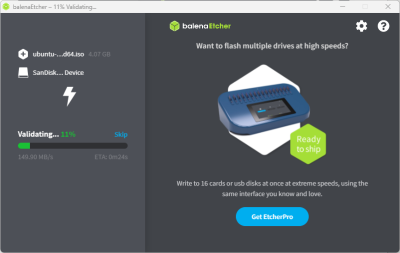
Once Etcher finishes flashing, it will validate that it has flashed the image correctly. Do not skip this. Now your Linux installer is ready to use.
Booting the Installer
Bios settings
Before you install Linux, you will need to change a few settings in your BIOS. Shut down your computer, then press the power button and immediately start spamming the F2 key until the BIOS menu appears.
We only need to do two things here:
- Make sure your laptop is in Dynamic graphics mode (Hybrid mode)
- Disable Secure Boot. Most Linux operating systems will not boot with secure boot enabled, and even for the ones that do, the NVIDIA drivers will not install with secure boot enabled.
Once you have checked these settings, save and exit the bios.
Booting from the USB Stick
Shut down your computer again. Make sure your Linux USB is plugged in. Then press the power button and immediately start spamming the F12 key until the boot select menu appears. Use the arrow keys to highlight your USB drive, then press enter to boot from it. If it fails to boot or starts booting Windows you probably forgot to disable secure boot.
Eventually you will be presented with the Linux installer screen. This will look different on each Distro, but the process is more or less the same.
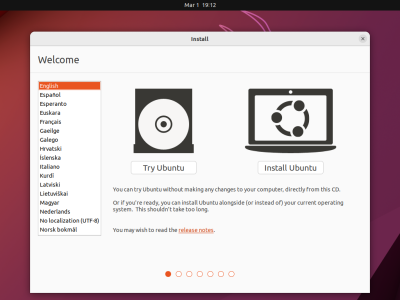
Most Distros give you the option to try the operating system before you install it. If you select this option, the installer will drop you to the desktop. You will be able to use the operating system in it’s entirety, however any changes you make or files you create will be deleted when you shut down.
When you are ready to install the OS, select the “Install” option or open the installer program if you are on the live desktop.
Installing Linux
There are three common ways to install Linux:
- Overwriting Windows
- This will erase windows and make Linux the only operating system on your computer (The nuclear option.)
- Installing Linux on a Second SSD
- This is the method you should use if you have two SSD’s in your computer and wish to dedicate one to Linux while leaving the other for windows (I recommend using this method for dual booting, if possible)
- Installing Linux on the same SSD as Windows
- While you can install Linux and Windows on the same drive, I do not recommend it because the installation process can easily result in data loss, and because windows has a tendency to overwrite the Linux bootloader whenever it recieves a major update, bricking your Linux install. If you want Linux and Windows on the same drive I would suggest using a Virtual Machine for Linux instead.
The Install Process
Open the Linux installer program.
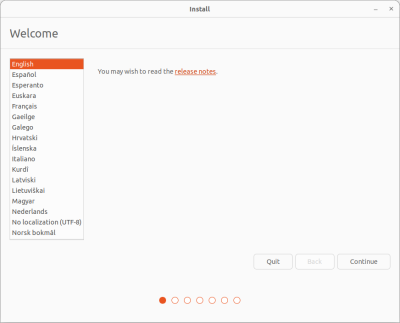
The first window you will see will ask you to select your language.
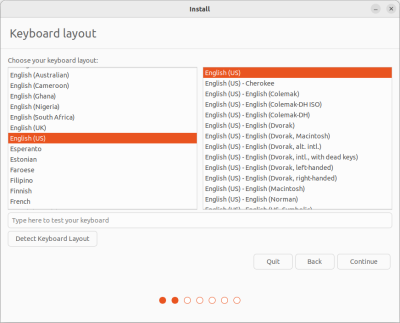
The next will ask you to select your keyboard layout. Then you will be asked to connect to a Wi-Fi network so the installer can download and install updates and drivers. You can skip this if you wish, though I don’t recommend doing so.
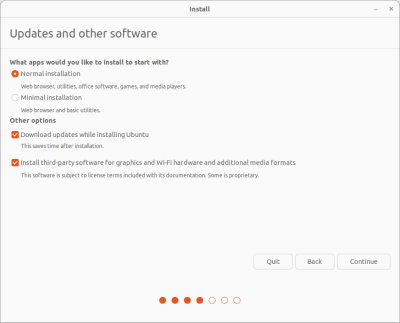
Then you will be asked what type of installation you wish to do. I recommend selecting “Normal Installation”, and checking the boxes for installing updates and third-party software.
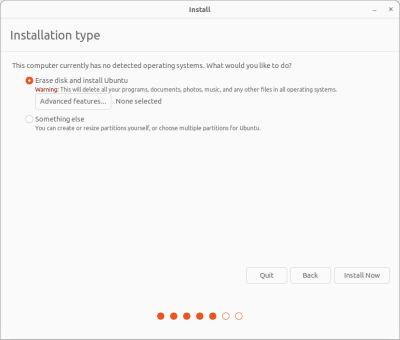
If you have multiple SSD’s, it will ask which one you wish to install Linux on. For Method 1, choose the one with windows on it. For Method 2, choose the SSD without windows on it.
Next make sure you have everything backed up, then choose “Erase disk and install Ubuntu” and then click “Install Now.”
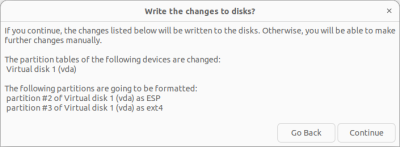
You will be presented with a window like this showing the changes that will be made to the disk. This is your last chance to abort the installation. Once you click “Continue”, any files that were contained on that SSD, including the windows operating system, will be permanently erased. If you aren’t sure you have everything backed up that you want backed up, click “Go Back” and reboot back into windows to back everything up. Otherwise click “Continue” and Linux will begin installing.

You will then be asked to click on your approximate location. This is used exclusively to set your time zone, and does not need to be exact.
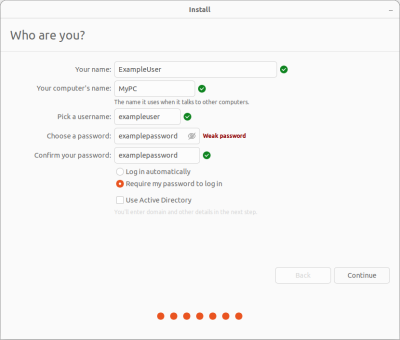
Finally, you will be asked to create your user account. Once you click continue, Linux will begin installing.
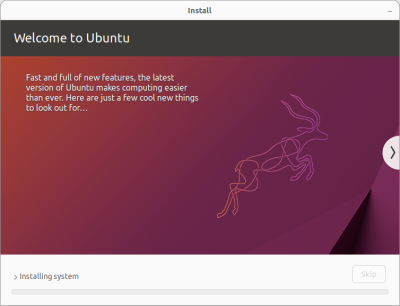
Once again, this can take anywhere from 5 minutes to an hour or more depending on how fast your USB drive is, and how fast your internet connection is. Once the installer is done, it will ask you to reboot your computer. Once you click reboot your computer will boot into your new Linux operating system. You may remove your Linux install USB at that point.
First Boot
You will be greeted with the login screen for your OS. Login with your user account. You will then be greeted by a short on-boarding experience that will take you through the basic features of your new OS, allow you to connect your online accounts, and set some personal preferences. Once you finish the on-boarding experience you will be greeted by the desktop. We are almost done installing, we just need to install the NVIDIA drivers. First make sure your computer is up-to-date. Open the terminal app and execute the following two commands:
sudo apt update
sudo apt upgrade
You will need to type your password for each of these. You will notice that the terminal does not give any sort of white dots or indication as you type your password, this is normal. Just type your password and then press Enter.
Once both are done, open your Distro’s application menu and search for “Drivers”. An app should appear called “Additional Drivers” or something similar. Open this app. You should be greeted by something like this:

Click the dot for the newest NVIDIA driver available2) and click “Apply Changes.” Note that the exact driver version may be different than I have shown here. Once this finishes, reboot. Congratulations, you have successfully installed Linux on your Legion!
Installing Apps
On Linux, apps are rarely downloaded from a web browser. Instead, they are installed via a package manager, basically an App Store. To install an app, simply open Ubuntu Software (Or your Distro’s equivalent).
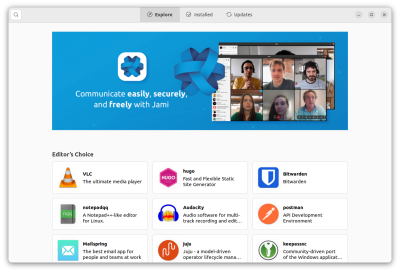
Search for the app you want to install, then click “Install” and wait until it finishes. Be patient.
To uninstall an app, click the installed apps tab and find the app you don’t want anymore, then click “Uninstall”.
To Update your computer, use the updates tab.
You may have noticed by this point that many of your favorite apps are not here. Fortunately, you can fix this by installing the Flathub repository which contains apps such as Discord, Google Chrome, Steam, and Microsoft Edge. Instructions are on their website.
Legion-Specific Software
If you have a Legion 5/5 Pro with an RGB keyboard, you can use 4JX's Legion-KB-RGB to control it.
If you have a Legion 7, you can use OpenRGB to control it.
And that’s it! You have successfully installed Linux! Enjoy!