Windows Clean Installation
For demonstration purposes I will be using a virtual machine while making this guide. This applies to both VMs and physical hardware.
Requirements
- 8GB flash drive or larger
- BIOS/boot menu access
- Internet Connection
- Windows 11 ISO
- Windows License
What you don't need (Windows 11)
- A Microsoft Account
- TPM
- 8th gen processor or newer
- Internet connection during setup
Recommended
- Driver packages for your device
- Download drivers for your computer - For desktops, all you really need is the driver for your graphics cards
- For Laptops, we recommend you download stuff like audio, wireless, graphics and fingerprint readers in advance
- Put these drivers on your install flash drive
- Secure Boot enabled
- UEFI boot (non CSM) enabled
Downloading the ISO
There are 3 ways to get a Windows ISO
- Official from Microsoft
- allows direct ISO download
- you need to use Media Creation Tool to create the ISO
- Unofficial -
tb.rg-adguard.net- UUPDump, useful if you want to compile a more custom image. Takes very long to compile!
- Built in download method in Rufus
Creating the installer
Note: If you don't want to use Rufus to create the installer, follow the VM guide at the end of this article.
- Open Rufus (this requires Administrator privileges)
- Device: Select your flash drive
- Boot Selection: Select your ISO
- Image Option: Standard Windows Installation
- Partition Scheme and Target System - GPT if installing under UEFI (any modern machine), UEFI (non CSM)
- MBR for older machines - NOT RECOMMENDED, BIOS (or UEFI-CSM)
- Leave everything else as default

- Press Start, a “Windows User Experience” will pop up - Windows 11 Only (skip to step 10 on Windows 10)
- Check: - Windows 11 Only - Remove requirement for 4GB+ RAM, Secure Boot and TPM
- Remove requirement for Microsoft Account
- Disable data collection
- Optional: Create a local account with username
- Press OK
- Press OK to format the flash drive and create the installer

- This will take 2-15 minutes, depending on your flash drive's performance


Booting from the installer
- Turn off your computer
- Make sure it isn't connected to the Internet (disconnect Ethernet cable)
- Insert the installer flash drive
- Turn on the computer and HOLD the boot menu button.
- This is different on every computer, most often F2, F9 or F12
- F12 on Lenovo devices (Legions and Thinkpads)
- Wait for it to boot into the installer
Using the installer
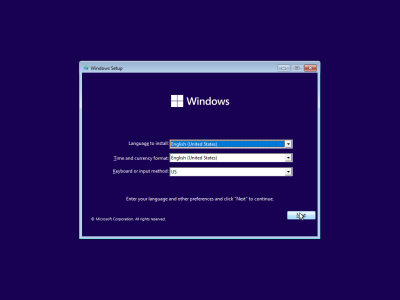
- Select your language (most ISOs only have one option depending on what you downloaded), region and keyboard layout
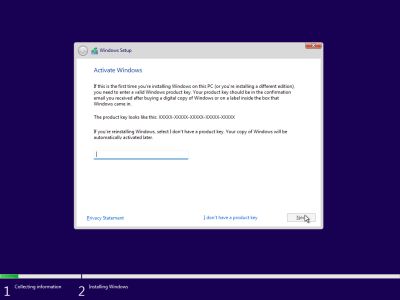
- Click Install Now
- If you get a product key prompt, select I don't have a product key
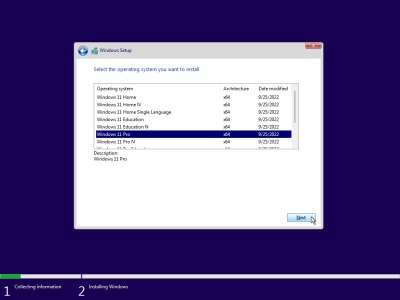
- Select your Windows edition
This screen might not pop up if your device has an OEM Windows license and press Next
- Accept the EULA and press Next
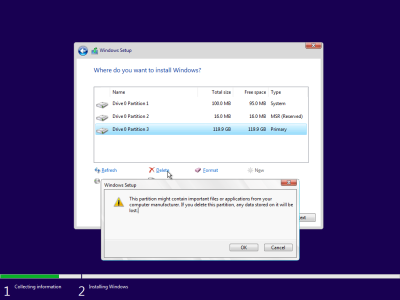
- Select Custom - Install Windows only
- Delete all partitions on the disk you want to use
- When you see Drive X Unallocated Space xxxGB select this disk and press Next.
Required system partitions will be created automatically
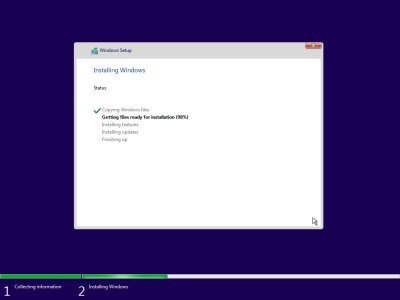
- Now let Windows installer copy all required files. When it reboots, disconnect the USB drive and let it boot.


First Boot
Steps 4 - 6 are only necessary on Windows 11
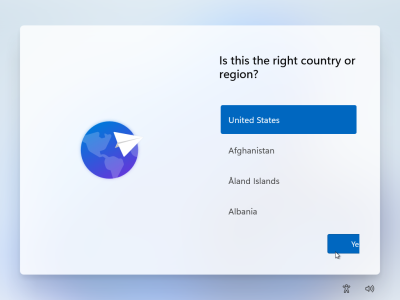
- Select your region and press Yes
- Select your primary keyboard layout and press Yes
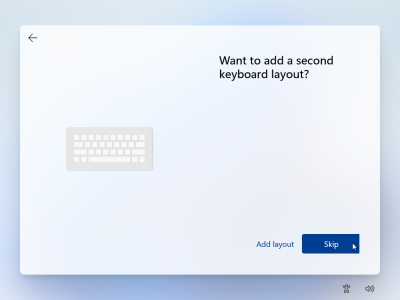
- Skip adding a second keyboard layout
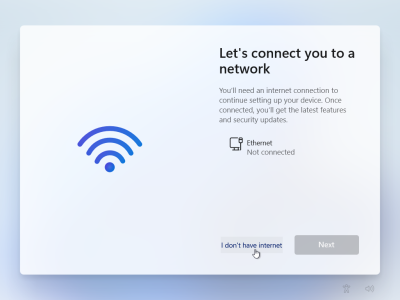
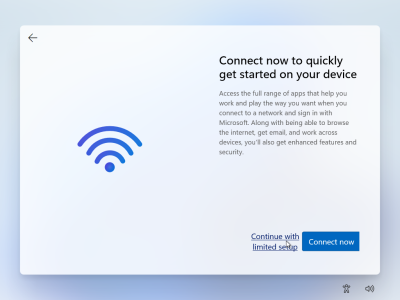
- When you get to “Lets connect you to a network” menu do the following - Press Shift + F10 to open CMD
- Type


OOBE\BYPASSNRO
- The setup will now restart. Go through 1 - 3 again.
- Now a button I don't have internet should be visible. Click on it.
- Use Continue with Limited Setup
- Select your username


Do something basic, Windows will create user folder based on that. Keep it short, no diacritics
- On the next page do NOT setup a password.
- On the Privacy Settings page untick everything and click Accept
- Now let it do its thing.
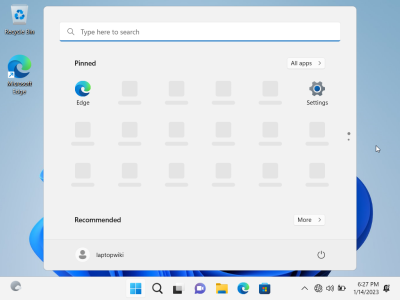
- Now you should be on the desktop
- (Optional) Connect your installer flash drive and install all the drivers
- Go to Settings - Accounts and set a password for your account
- Connect to the internet and let Windows Update to install updates and drivers.
- (Optional) Run ShutUp10 https://www.oo-software.com/en/shutup10


Lenovo Legion
Legion users (aimed at 2021 Legion and newer, older models should also follow), after your installation is finished DO NOT CONNECT TO THE INTERNET
Follow this guide: Setting up a Lenovo Legion without an OS
Upgrading Windows Home to Windows Pro
If your device came with Windows Home and you want to upgrade it to Pro, you can do so without reinstalling.
Often the Windows Installer doesn't even give you the option of what Edition to pick. Upgrading Windows Home to Windows Pro without reinstalling
Virtual Machines
Bypass "This PC can't run Windows 11" in the installer
Real fix
- Create a VM with EFI mode enabled - Virtualbox
- Create a Gen2 VM - HyperV
Bypass
This often happens when making a Windows 11 VM
- Press Shift + F10 to open cmd
- Run regedit to open Registry Editor
- Navigate to
Computer\HKEY_LOCAL_MACHINE\SYSTEM\Setup
- Right click on the Setup folder
- Select New - Key
- Name this key/folder LabConfig
- Right click on LabConfig folder
- Select New - DWORD (32-bit) Value
- Right click on this new item, select rename and name it BypassTPMCheck
- Now double click on BypassTPMCheck and change the value to 1 - Hexadecimal
- (Optional)Repeat points 7 - 10 with following DWORDs, all with Value of 1
- BypassCPUCheck
- BypassRAMCheck
- BypassSecureBootCheck
- You can also download the .reg file from LaptopWiki CDN and apply it using OBBE Regedit
Virtualbox
- After you get to the desktop, go to
Top Bar - Devices - Insert Guest Additions CD
- Run the VBoxWindowsAdditions-amd64 (I'm 99% certain you are on 64bit Windows)
- Reboot to get basic GPU drivers